This page covers the basic information a player needs to know about PVE (player vs. enemy) and PVP (player vs player) combat in Sherwood Dungeon. Success in combat is generally dependent on the player's ability to minimize the time they are vulnerable to attack while finding safe opportunities to score block-boosted counterattacks.
Attacking[]
The standard attack is performed by pressing the CTRL or 1 key on the keyboard. It is the player's primary method of dealing damage and can either be tapped to perform a single strike, or held to attack repeatedly. All standard attacks can be interrupted at any point in their animations by pressing the block button, casting an amulet, or using a power move. This "attack canceling" is a particularly useful technique to learn in order to minimize the time the player is vulnerable during combat. When pressing the attack button, one of four attack animations will be executed.
- Mid-level thrust: Fairly quick with moderate endlag. It is advised to cancel the attack's animation directly after the attack lands
- High poke: Similar speed to the thrust. Again, it should be cancelled directly after hitting the opponent
- Left hand uppercut: similar speed to the thrust and poke. Its hitbox comes out slightly earlier than the attack animation suggests.
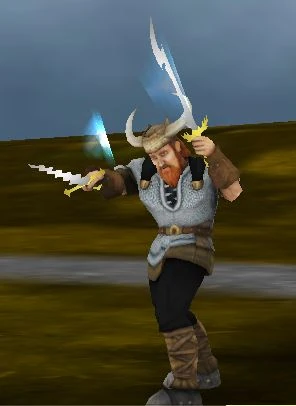
- Double horizontal swing: A lengthy attack that swings twice, but only consists of one hit which occurs deceptively late into the first swing. It has by far the longest attack animation in the game, leaving the player extremely vulnerable to incoming damage if fully committed to. Due to how long it takes for the hit to come out, in PVE it is useful to cancel the move as soon as it starts up especially when facing monsters who are incapable of blocking. In PVP it may score hits against players who incorrectly predict one of the faster attacks and block too early, but is nonetheless still considered a risky move.
It is also important to note that the player's passive healing is stopped during all attack animations. As a result, simply holding down the attack button will almost always result in the player losing more health than necessary.
Blocking[]
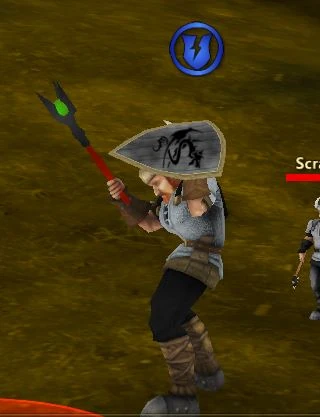
The block bonus icon
Blocking is performed by inputting SHFT + CTRL or the 2 key. Successfully blocking an attack allows the player to negate all incoming damage and also gain a x2 damage multiplier towards the next attack (including power moves). A blue cracked shield icon appears above the player's head when this bonus is active and the bonus is only consumed upon the player's next successful hit. Hiitting the opponent's block does not consume the bonus. The bonus disappears only if the player moves out of combat range. The icon is also set to disappear after some time, however the bonus will still be active so long as the player remains in combat.
Unlike when attacking, the player still maintains their passive healing effect while blocking, so successfully blocking many attacks in a row is the most effective method to regain health in the middle of combat. Blocking is also the most commonly used method to "attack cancel" the long animations of the player's standard attacks as well as the amulet attack.
SHFT + CTRL or the 2 key can be held to perform continuous blocks, however the vulnerability time between blocks is considerable when using this technique. This is why it is advisable to simply tap the block key to execute consecutive blocks as this decreases the vulnerability time between blocks.
Power Moves[]

Power Moves are special attacks the player can perform by pressing CTRL plus the key corresponding to the power move. In the mobile version of the game, the right sidebar must be expanded to select a power move. On average, power moves deal anywhere from 1.5 to more than 2 times the damage of standard attacks which makes them especially powerful when used in conjunction with the x2 bonus acquired from blocking. They can also be used to cancel the animation of any standard attack at any time and thus can effectively be used in PVP to mix-up opponents and bait early blocks. Unlike standard attacks, power moves do not stop passive healing but cannot be cancelled. At level 1, the player starts with only the Round House Kick, but new power moves are unlocked as the player levels up. When a power move is used, it drains the green stamina bar which gradually replenishes over time. There exists six different power moves.
| Keys | Skill | Level | Notes |
|---|---|---|---|
| <Ctrl+Z> OR 4 | Round House Kick | 2 | A right to left kick |
| <Ctrl+X> OR 5 | Lunging Double Strike | 3 | A fast downwards strike following a large windup |
| <Ctrl+C> OR 6 | Reverse Hammer Strike | 4 | A quick spin that ends in a left handed strike |
| <Ctrl+V> OR 7 | Spinning Hook Kick | 6 | A leaping spinning kick |
| <Ctrl+A> OR 8 | Flash Kick | 8 | A short squat followed by a backflip |
| <Ctrl+space> OR 9 | Spinning Strike | 10 | A rapid spinning attack that hits twice |
There is currently no evidence that some power moves inflict more damage than others. All power moves appear to roll a random number within the player’s damage stat with a strong preference for values closer to the the upper limit of the player’s damage range.
In general, the Round House Kick and especially the Reverse Hammer Strike are considered the fastest power moves and are valuable in both PVP and PVE for their speed and ease of timing.
The Lunging Double Strike is a popular power move for performing baits and fake-outs in PVP due to its moderate windup. This kind of technique is typically accomplished by performing a standard attack to bait an early block and then cancelling the standard attack with the Lunging Double Strike just before the hit is about to connect. If timed correctly, the Lunging Double Strike’s startup animation will outlast the opponent’s active blocking frames and score a hit. The Spinning Hook Kick and the Flash Kick can be used for similar purposes and both share seemingly identical frame data.
The Spinning Strike is considered by the vast majority of players to be the worst power move for PVP due to its incredibly lengthy animation. Skilled opponents will be able to block both strikes and have ample time to counterattack with a boosted power move of their own. The Spinning Strike however, can trivialize most PVE encounters especially those against monsters that are incapable of blocking. By equipping two weapons with sufficiently high damage, a single Spinning Strike, even without the block multiplier, has a high chance of one-shotting all but the largest monsters and bosses.
Character Stats[]
Health, armor, and damage are the three stats that play an important role in Sherwood Dungeon’s combat system.
Health[]
The player’s health increases automatically with each level up and can only be further increased by equipping certain rings, such as the Ring of Safekeeping or the Ring of Unnatural Health. Currently, the ring of Unnatural Health grants the most health out of any ring in the game as it adds bonus health equal to 4 times the player's level. The player will passively regain their health when doing anything except performing the standard attack. Health potions can be used to instantly regain health and can be purchased from merchants.
Armor[]
Armor is acquired by equipping shields as well as certain rings. Without any armor ring or shield equipped, the player's armor is set to 0. Armor can dramatically impact the player's survivability. A player with maximum armor can survive on average x1.6 more hits than when at 0 armor, however this comes at the cost of greatly reduced damage output as the player must equip a shield in place of a second weapon. The maximum armor for any given level can be acquired by equipping any shield with a yellow icon background alongside any pure armor ring, such as the ring of protection.
Damage[]
Damage is determined by the player's equipped weapons. Equipping a single non-elemental weapon sets the player's damage stat equal to the damage range of the weapon. When equipping two weapons, the game adds the lower damage limits and the upper damage limits of both weapons and uses the result as the player's damage stat. For example, equipping a Dagger with 1-721 damage and a Warhammer with 180-841 damage gives the player 181-1262 damage. Elemental weapons appear to give a very small bonus to the player's damage stat that is not indicated on the weapon's infobar. For instance, a Shadowfey Scepter that deals 377-882 damage will actually give the player 380-889 damage (It is currently unknown how this bonus is calculated or whether or not it is simply an error made by the game). Furthermore, elemental weapons have bonus damage equal to the player's level added to their lower and upper damage limits, making them often hit harder than their non-elemental counterparts. As such, players wishing to maximize their damage output should dual wield elemental weapons though this will come at the cost of survivability. It is also worth noting that certain quest weapons, like the Dragon Claw Scepter, and all level-locked scroll weapons give higher damage than other weapons.